
I hate solicitors. Friday night, kids are finally asleep, mom and dad are tired and FINALLY sit down…doorbell rings. Sound familiar? “Hi-how-ya-
Yeah, not interested and you ARE trying to sell me something, no matter what you tell yourself.
When you knock on my door at 8 PM (and you’re not family or friends) you simply aren’t welcome.
Or maybe I’m just a grinch.
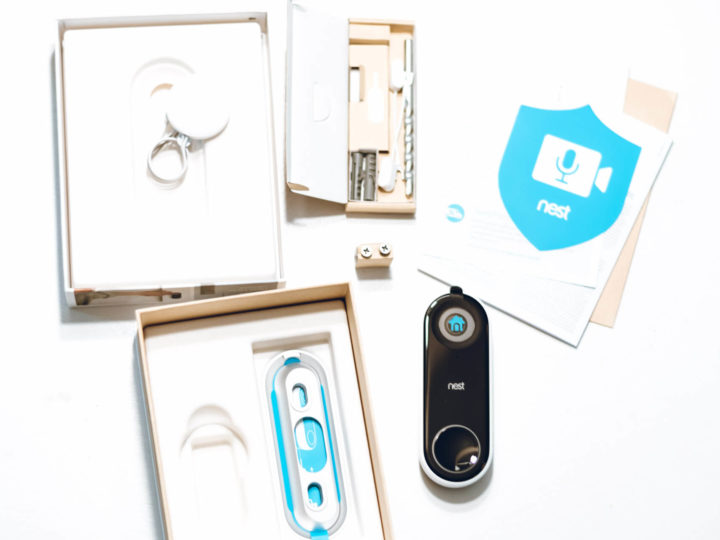
While I can’t stop people from knocking on the door, I can now finally stop them from ringing the doorbell, even if they push the button thanks to the Nest Hello smart doorbell (and lucky for you, I’ve put together all the installation instructions in this post)!
We’ve only had it for two days, but I’m in LOVE. So, I was inspired to write an honest review/how-to from a very tired mama.
I chose this particular one for its quiet time feature – you can turn OFF the indoor chime! I’ll never have to worry about our kids waking up from a late-night solicitor anymore!
Removing The Old Hardware

Our old doorbell was just fine. It lit up, worked well enough, and I basically never had to think about it. Which is pretty much everything you could want in a doorbell. The actual chime inside though? Woof.

Check THAT circuitry out. I’ve never seen such an old circuit board. I mean it has diodes. I’m fairly certain it’s the original chime with the house, which makes it nearly 20 years old. Time for an upgrade! Here’s how I got removed our old doorbell and chime:
- Turn off the power to the doorbell/chime circuit. (If you aren’t sure, just cut power to the whole house)
- Unscrew the doorbell cover from the wall. There’s two wires (probably red and white) on the back, so unscrew those too. Tape the wires to the wall so they don’t fall in the hole.
- Take off the cover of your chime (ours just slipped off), and before unscrewing it, take a picture of where the wires are connected (usually labeled front, rear, and trans)
- Unscrew the chime unit from the wall, and snip or disconnect the wires to fully detach it.
While you’re at the breaker box turning the power off, it’s a good idea to check and make sure your breakers are all seated securely. Head on over to this post to see what to do if one of your breakers is loose!
Optional (Upgrade The Transformer)
If you have a door chime as old as ours, you’ll probably have to upgrade your transformer as well. The fancier/newer doorbells like the Nest Hello instructions say they require the installation of a higher voltage transformer than the old units, like this one. It’s just a little rectangle that changes the power type from regular 120V power that is used throughout the rest of your home (outlets, etc.) to low-voltage power that the doorbell system uses. Sometimes it’s in the box the chime was attached to, sometimes it’s somewhere else. We got lucky and were able to upgrade it right in the box – you just need something between 16-24V AC. Installing it was super easy.
- Make sure the power is off.
- Unscrew the skinny, low voltage wires from the two (sometimes three) screws on the front of the transformer.
- Unscrew the wire caps that attach the transformer to the romex coming into the box.
- Remove the old transformer completely (it shouldn’t be attached to anything at this point.)
- Insert the new transformer, connecting green to ground (the bare copper wires), black to black, and white to white.
- Reattach the skinny, low voltage wires to the front of the new transformer.
Installing The New Chime

Our old chime was incredibly complex – it rang for at least 30 seconds every time, hence the diodes. And while the wiring was working, it didn’t match a single diagram I could find in my holy-grail electrical book OR anywhere online. So, I had to wire my new chime from scratch. Everybody’s situation is different (one doorbell/two chimes, two doorbells/one chime, etc), but I found these diagrams super helpful. After tracing my wires and rewiring according to the diagrams, the new chime was installed! Hooray!
I chose a cheap, simple, sleek chime since I was investing so much more in the actual doorbell. It’s a NuTone unit, and I think it was under $20! If you already have a newer chime, it will be MUCH easier. Like any other ‘swap-it-out’ electrical project, just copy the old layout of wires and reproduce it for the new unit. Here’s how:
- Make sure the power is off.
- Refer to the picture you took of the original chime before you removed it from the wall.
- Connect the low-voltage wires to the new doorbell chime the same way the picture you took shows.
- Screw the new doorbell chime unit into the wall, making sure it is level.
- Replace the cover, paint and touch up as needed (I still need to do this, but with our kitchen renovation going on, I’m going to tackle it in a few weeks when I re-texture the wall)
Installing The Nest Hello Camera Unit

Now for the fun part – installing the Nest Hello doorbell. Earlier, you removed the old doorbell and there were two wires (usually red and white) sticking out of the wall. Time to put it back together!
- (Optional) If your camera is perpendicular to your door, like mine is, you’ll probably want to install the wedge plate so the viewing angle is better. Make sure you put that on before the back plate.
- Install the back plate for the Nest Hello camera unit (make sure it’s plumb by using a level!)
- Connect the low-voltage wires to the back of the Nest Hello. The side you connect it to doesn’t matter at all.
- Pop the Nest Hello into place on the mounting plate. It should click in and feel very sturdy.
- Turn the power back on!
Nest Hello Doorbell Reveal

Installation of a Nest Hello smart doorbell is really simple (as long as you follow the instructions!) – swap out a few wires, upgrade a transformer, and you’re done. And guys? It’s made a world of difference in our home. I haven’t been overly snarky to a single solicitor since we installed it. Nights are peaceful, I get notifications every time someone comes to the door or leaves a package, and I feel safer since it’s a security upgrade, too. Being able to turn my doorbell off is a huge win for our family – all the other features are gravy. Plus, it really modernizes our front door, and goes really well with the new lockset and paint we did last year!
Do you have a smart doorbell? What brand do you have? I chose Nest because we’ve already invested in their cameras and been very happy with them, but I’d love to hear your experience with other brands, too! As always, if you have any questions, feel free to reach out!
Natalie at NeliDesign
Monday 1st of April 2019
We're also looking into buying the Nest Hello because we have the cams. Now, if they could find something to get rid of the phone calls at 7 in the mornings saying "I'm calling about your computer" haha yeah, right! :P Good job on your post, I will be reading it all over when I install mine!
Catherine
Monday 1st of April 2019
I LOVE it! So nice to see who's there! If I could get rid of half of those unwanted calls, I'd be so happy!