
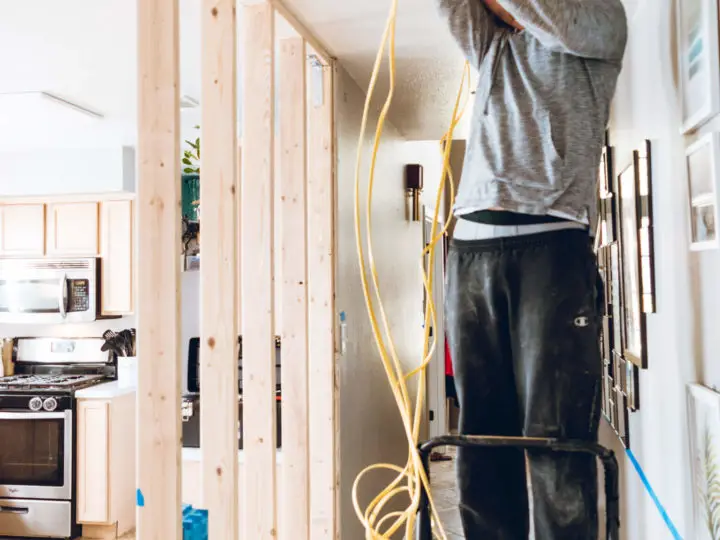
When we decided to close in the big opening in our kitchen to make room for more cabinets, I knew we were going to have to do something about the lighting in the hallway.
There’s a pretty easy (in theory) solution – just add more lights! But, like most DIY projects, that’s easier said than done. This particular project calls for three-way switches, which means it’s a little more difficult than just swapping out a light fixture.
Here’s how we’re diagramming our electrical work, so when it comes time to do the wiring, we know exactly what we’re doing.
Now, I’m DEFINITELY not an electrician. At all.
But I do believe that most home renovation projects can be done by homeowners, and people shouldn’t be afraid to dig in and really get to know their home. You’re more capable than you think.
It would absolutely be faster, easier, and much less of a hassle to just let an electrician come and do the work, but you pay a premium for all of that. This is a budget renovation which means we plan on doing most (if not all) of it ourselves.
There are a few basics that you have to know about residential electrical work, so if you’re brand new, check out this article. This particular job requires that we use a three-way which is a kind of switch that allows you to turn on or off the lights from multiple locations.
Think about the switches at either end of a hallway in your home – those are most likely three-way switches.
The term three-way switch is kind of confusing, but all it means is that either both switches are up, both are down, or they are opposite of each other. Add those together, and you get a three-way switch!
There are no on/off markings on three-way switches. There’s a green screw for your ground, a light brass screw for your travelers, and a dark brass screw for your common.
You might see stab-in slots on switches as well, but I try to stay away from them in favor of screws since they lend themselves to a more secure connection.
Is your head spinning yet? I totally understand. Honestly, just staring at wiring diagrams for a few hours is what did it for me.
BUT! Now I have that
Okay, so with all of that out of the way, we’re planning on ‘editing’ two of the circuits in our kitchen/hallway area. First up is the hallway. I put together a little diagram of

Our hallway currently only has one light (C in the diagram), and we are planning on adding two new lights (D and E in the diagram).
We also only have one existing light switch (1 in the diagram), which means I need to add another switch (3 in the diagram) to the other end of the hall.
Generally, you want to have a switch on either end of a hallway so you don’t have to walk in darkness to turn on a switch. Here are the existing wires:

Wall switch #1 is wired to light C with 12-2 romex, which consists of 3 wires: a black

There’s a lot to unpack here, but basically, we’re running 12-3 romex from the first switch to the first light, 12-2 between each light, and then 12-3 from the last light back to the second switch.
12-2 Romex and 12-3 Romex are just types of wire you can buy. 12-2 has regular white, black, and copper, where 12-3 has red, white, black, and copper.
Each has its own use, but generally, most of the wiring in your house is probably 12-2 (12-3 is used commonly for
Just like you learned (hopefully) in science class, circuits have to be complete to run.
The red, white, and black wires are all working together to provide electricity so when you flip the switch, the light comes on. The ground keeps your home safe from fires if something goes wrong with the circuit.
Looking at that diagram might make your head spin, but if you take a minute to draw the diagram again yourself, it will be much clearer.
Before drawing these I had a vague idea of what I was doing, but after drawing them, I feel much more confident and ready to tackle the project.
So now that the hallway is planned, it’s time to turn our attention to the kitchen. This is what we currently have:

Switch 2 will be new, switches x
Currently, we can turn on light A from the hallway, and light B can be controlled from a switch above the cabinet next to the fridge or switch 4. This is what it’ll look like when we have it all wired up.

Switch 2 and 4 will both be able to turn on/off the lights in the kitchen all at once (something I’ve wanted since we moved in), which means another three-way switch install, and switches 1 and 3 will be able to turn on the hallway lights from either end.
This diagram doesn’t take into account the other wiring we’ll want to do (move a few outlets on the sink wall, install some outlets on the desk wall, wire for a microwave, etc), but it’s the same general idea for those.
So on a Friday night, we got to work. Stuffing Romex in the ceiling and cutting 19 holes in our drywall isn’t glamorous. Definitely prepare for some well-deserved showers at the end of the day!
Working above our heads that much lead to us wishing we had started lifting weights in preparation, but it all worked out just fine in the end.

It took me probably 3 hours to research everything and put together the diagram, and it took us an entire weekend to do the wiring with kids – if you had no interruptions, you could probably do it in one day.
A pro could most likely get this done in just a few hours, so though it’s cheaper, you’re paying for it in your time.

I’m happy to make that trade, though. According to
I’m guessing we saved over $2000 on this project alone, which definitely helps in the grand scheme of things for our budget kitchen renovation.
If you are considering installing new lights or doing some electrical work around your home, think about doing it yourself! After LOTS of research and killing the main switch on your house (just to be safe), of course.
Need more info on DIY electrical work? Give this blog a read, where I break down the difference between electrical tape and other tapes you might be tempted to use as substitutes.
I feel incredibly satisfied every time we do an electrical project, and it’s neat to see how things are connected inside your home.