
Pilot holes can definitely be inconvenient, but they’re a standard step in DIY projects for a reason – they prevent problems down the line. So if you’ve been known to skip a pilot hole in your past (ahem, me too) and want to learn more about why they’re so important, read on! I’ve recently had a few projects split on me and learned a ton about pilot holes in the process, including how deep to drill them.
Pilot holes should be either the same length as your fastener (screw, nail, etc), or just a few millimeters longer. Softer woods don’t require extra length, but harder materials require more room since they are less flexible. Use a piece of tape to mark your drill bit to ensure an accurate length.
I’ve definitely made my share of mistakes with pilot holes, but in trying to fix them I’ve picked up a lot of knowledge and some tips and tricks. In this post, I’ll cover whether or not you should always drill a pilot hole, when you really don’t need to, what the most recommended drill bit size is for pilot holes, how material hardness will change your pilot hole, and finally how to drill a pilot hole.
PS: Here’s a post about different wood panelings! Your newfound pilot hole knowledge could come in handy installing those.
Table of Contents
- How Deep Should You Drill A Pilot Hole?
- Should You Always Drill A Pilot Hole?
- What is the most recommended drill bit size for pilot holes?
- About Soft and Hard Woods
- Why Does Pilot Hole Size Matter?
- Pilot Hole Size Recommendations
- How to Drill a Pilot Hole
How Deep Should You Drill A Pilot Hole?
The depth at which you drill a pilot hole depends on a few things:
- The hardness of the material you’re drilling into
- Where on the board you’re drilling
- If you’re drilling into one board or multiple
Should A Pilot Hole Be The Same Length As The Screw?
Most people drill to the same depth as the screw or nail, but as I’ve mentioned above, it really depends on your material. If it’s a super fragile or expensive material, try drilling two test pilot holes in a scrap – one at the same depth as your fastener and another that’s just a hair longer. Then, you can determine which one feels right and avoid any issues before working on your main piece.
Material Hardness
For very hard materials like the end grain of plywood, hardwood, or MDF, leave a little bit of extra room by drilling just past the depth of the screw to allow for sawdust to compress. It doesn’t have to be a lot (and shouldn’t) – just a few mm past the length of your fastener.

Where On The Board You’re Drilling
Adding a fastener like a nail or a screw near the edge of a board is notorious for causing splits – and it’s the perfect place to use pilot holes. The reason boards split when you try to add hardware is because wood isn’t actually solid – it’s made up of thousands (millions?) of smaller fibers, which is also what gives it its beautiful grain.
When you use a fastener in the middle of a board, it’s easy enough for the fibers around it to move and adjust to accommodate…but when you try the same on the end of a board, there’s not enough material to flex and allow the new hardware. And as a result, it splits.
Thankfully, pre-drilling pilot holes is an easy way to prevent splitting – just be sure to use the right size drill bit, and drill slowly!
If You’re Drilling Into One Board Or Multiple (How To Avoid Jacked Screws)
Something really interesting happens when you use a screw to hold two boards together, and it has to do with the way screws work.
Most people (including me for a very long time!) assume that the threads of the screw are what grips, but that’s only the case if the material you’re screwing into ALSO has contact with the head of the screw. It’s the pull between the screw threads and the screw head that keeps things in place – they have to work together.
So, if you happen to be screwing all the way through one board and into another, you might find that the second board actually pushes away from the first – which definitely isn’t great news if you’re trying to glue those two boards together as it’ll never stick. This is called a jacked or bridged screw.
To avoid ending up with a jacked or bridged screw, you actually need to drill two different pilot holes. Man Made DIY has a great article on this – go check it out!

Should You Always Drill A Pilot Hole?
In short, it’s never a bad idea to drill a pilot hole. Other than initially saving time, I can’t think of a reason not to drill pilot holes – it will likely save you time, money, and stress down the road.
That’s especially true if you are afraid of cracking or splitting the material you are drilling into – in that case, you should definitely drill pilot holes. The same can be said for when you can’t afford for your project to skew, bend, warp – pilot holes allow boards to accept the fastener more accurately and securely.
I’ve never regretted drilling pilot holes, and I’ve often regretted not drilling them – though it might save you time upfront, it definitely doesn’t in the long run.
TLDR? Just drill the pilot hole – it’s worth it.
When Should I Not Drill A Pilot Hole?
There are only a few circumstances in which you can safely skip drilling a pilot hole:
- Exterior deck boards (the screws are usually pretty aggressive, though there’s debate about this)
- When appearance or structural integrity doesn’t matter
- When working with soft woods, and you’re not incredibly concerned with looks
What is the most recommended drill bit size for pilot holes?
Your pilot hole should be the same size as the interior, solid part of your screw (in other words, not including the threads). You can easily match the size of your drill bit to the interior of your screw by holding them up against each other. Then, look at them head-on. You want to be able to see the threads of the screw, but not the shank (the interior, solid part).
If you’re drilling a pilot hole for a nail, choose a drill bit slightly smaller than the diameter of the nail.
About Soft and Hard Woods
Softwoods have a lot of ‘give’ to them – and if you’ve ever made a project out of pine, you likely know all too well how easy it can dent. Other the other hand, hardwoods have a lot less give, and don’t dent or scratch nearly as easily.
For soft woods, you’ll be fine with a hole the same length as your fastener, but for hard woods, you’ll want to leave a little extra room and drill just a touch deeper.
Why Does Pilot Hole Size Matter?
A well-sized pilot hole will prevent your project from splitting, cracking, warping, bending, or stripping – and it acts as a guide to make sure everything goes in straight and level. If you drill a pilot hole too large, your fastener won’t get any bite. If you drill it too small, you run the risk of damaging your project.

Pilot Hole Size Recommendations
Most of the time, you just need to hold up your drill bit against your screw to know what size drill bit you need – ideally you’ll be able to match the drill bit size with the interior shank of your screw. But if you aren’t sure which size to use or want to be extra careful, you can use the chart below to determine what size drill bit you should use.
If you aren’t sure what size screw you’re using, you can order these really cool size gauges (they have standard AND metric!) that help you check – I have one in my shop and use it all the time.
| Screw Size | Pilot hole size for hardwoods | Pilot hole size for softwoods |
|---|---|---|
| #0 | 1/32″ | 1/64″ |
| #1 | 1/32″ | 1/32″ |
| #2 | 3/64″ | 1/32″ |
| #3 | 1/16″ | 3/64″ |
| #4 | 1/16″ | 3/64″ |
| #5 | 5/64″ | 1/16″ |
| #6 | 5/64″ | 1/16″ |
| #7 | 3/32″ | 1/16″ |
| #8 | 3/32″ | 5/64″ |
| #9 | 7/64″ | 5/64″ |
| #10 | 7/64″ | 3/32″ |
| #11 | 1/8″ | 3/32″ |
| #12 | 1/8″ | 7/64″ |
| #14 | 9/64″ | 7/64″ |
| #16 | 5/32″ | 9/64″ |
| #18 | 3/16″ | 9/64″ |
| #20 | 13/64″ | 11/64″ |
| #24 | 7/32″ | 3/16″ |
How to Drill a Pilot Hole
Step #1: Create a Dent to Guide The Drill Bit
One of my favorite tips is to gently dent the exact area where I want to drill my pilot hole – that gives the drill bit just enough guidance to actually go in where I intend it to. You can create this dent a few different ways:
- Use a punch (or any other small pointy tool)
- Use the sharp end of a screw
- The end of a manual/handheld philips head screwdriver (I LOVE this set, and it’s magnetic!)
- Use the drillbit itself (this should only really be done on softer woods like pine so you don’t damage your drillbits!)

Step #2: Clamp and Steady The Boards
Once you’ve created your dent, be sure to steady your work surface and clamp together your boards if you’re drilling through more than one.
Step #3: Measure The Depth Of Your Pilot Hole And Tape It On Your Drill Bit
To measure the depth of your pilot hole, hold your fastener (screw, nail, etc) up next to your drill bit, and use a bit of tape to wrap around the bit at the depth of your screw. Then, when you’re drilling, you’ll know how far to push the bit into the material.
Step #4: Align Your Drill And Drill The Pilot Hole
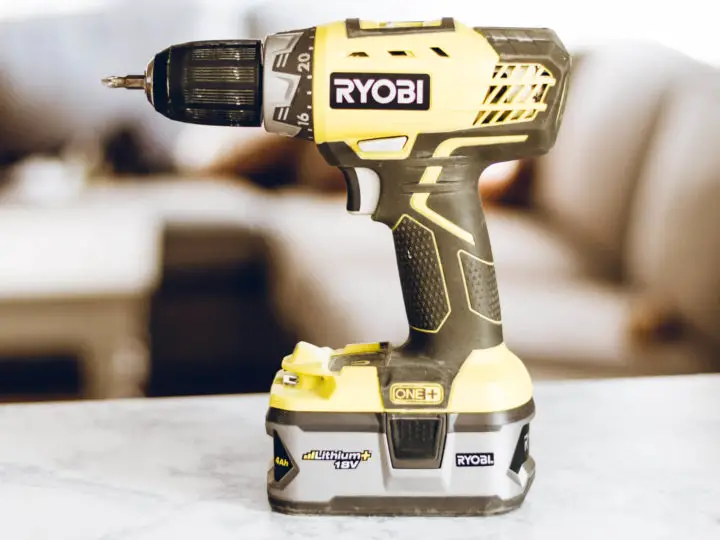
Line up your drill bit with the dent you made in step one and slowly let the drillbit work it’s way into the material. Be sure the angle that you’re drilling stays consistent throughout the drilling process. Many drills (including mine) have a level built-in that can help. (PS: If you’re looking for a drill or another gift for that special DIYer in your life, take a peek at my DIY gift guide)
Blow out as much dust as you can from the hole when you’re done drilling – it’ll give the screw a little more space and decrease the chances of splitting. And that’s it – you’ve drilled the perfect pilot hole!
Now that you know everything there is to know about drill bits, pre-drilling pilot holes, and how deep they should be, go build a project! I’d love to see what you’re working on – feel free to DM me on Instagram.