Toggle bolts have proven to be one of the most reliable fastening solutions for hollow walls and ceilings. These fasteners are now a must have in construction and DIY projects where traditional fasteners are not strong enough to provide support. In this post we will go over what toggle bolts are, how they work, and the correct way to put them in and take them out.
What Is a Toggle Bolt?
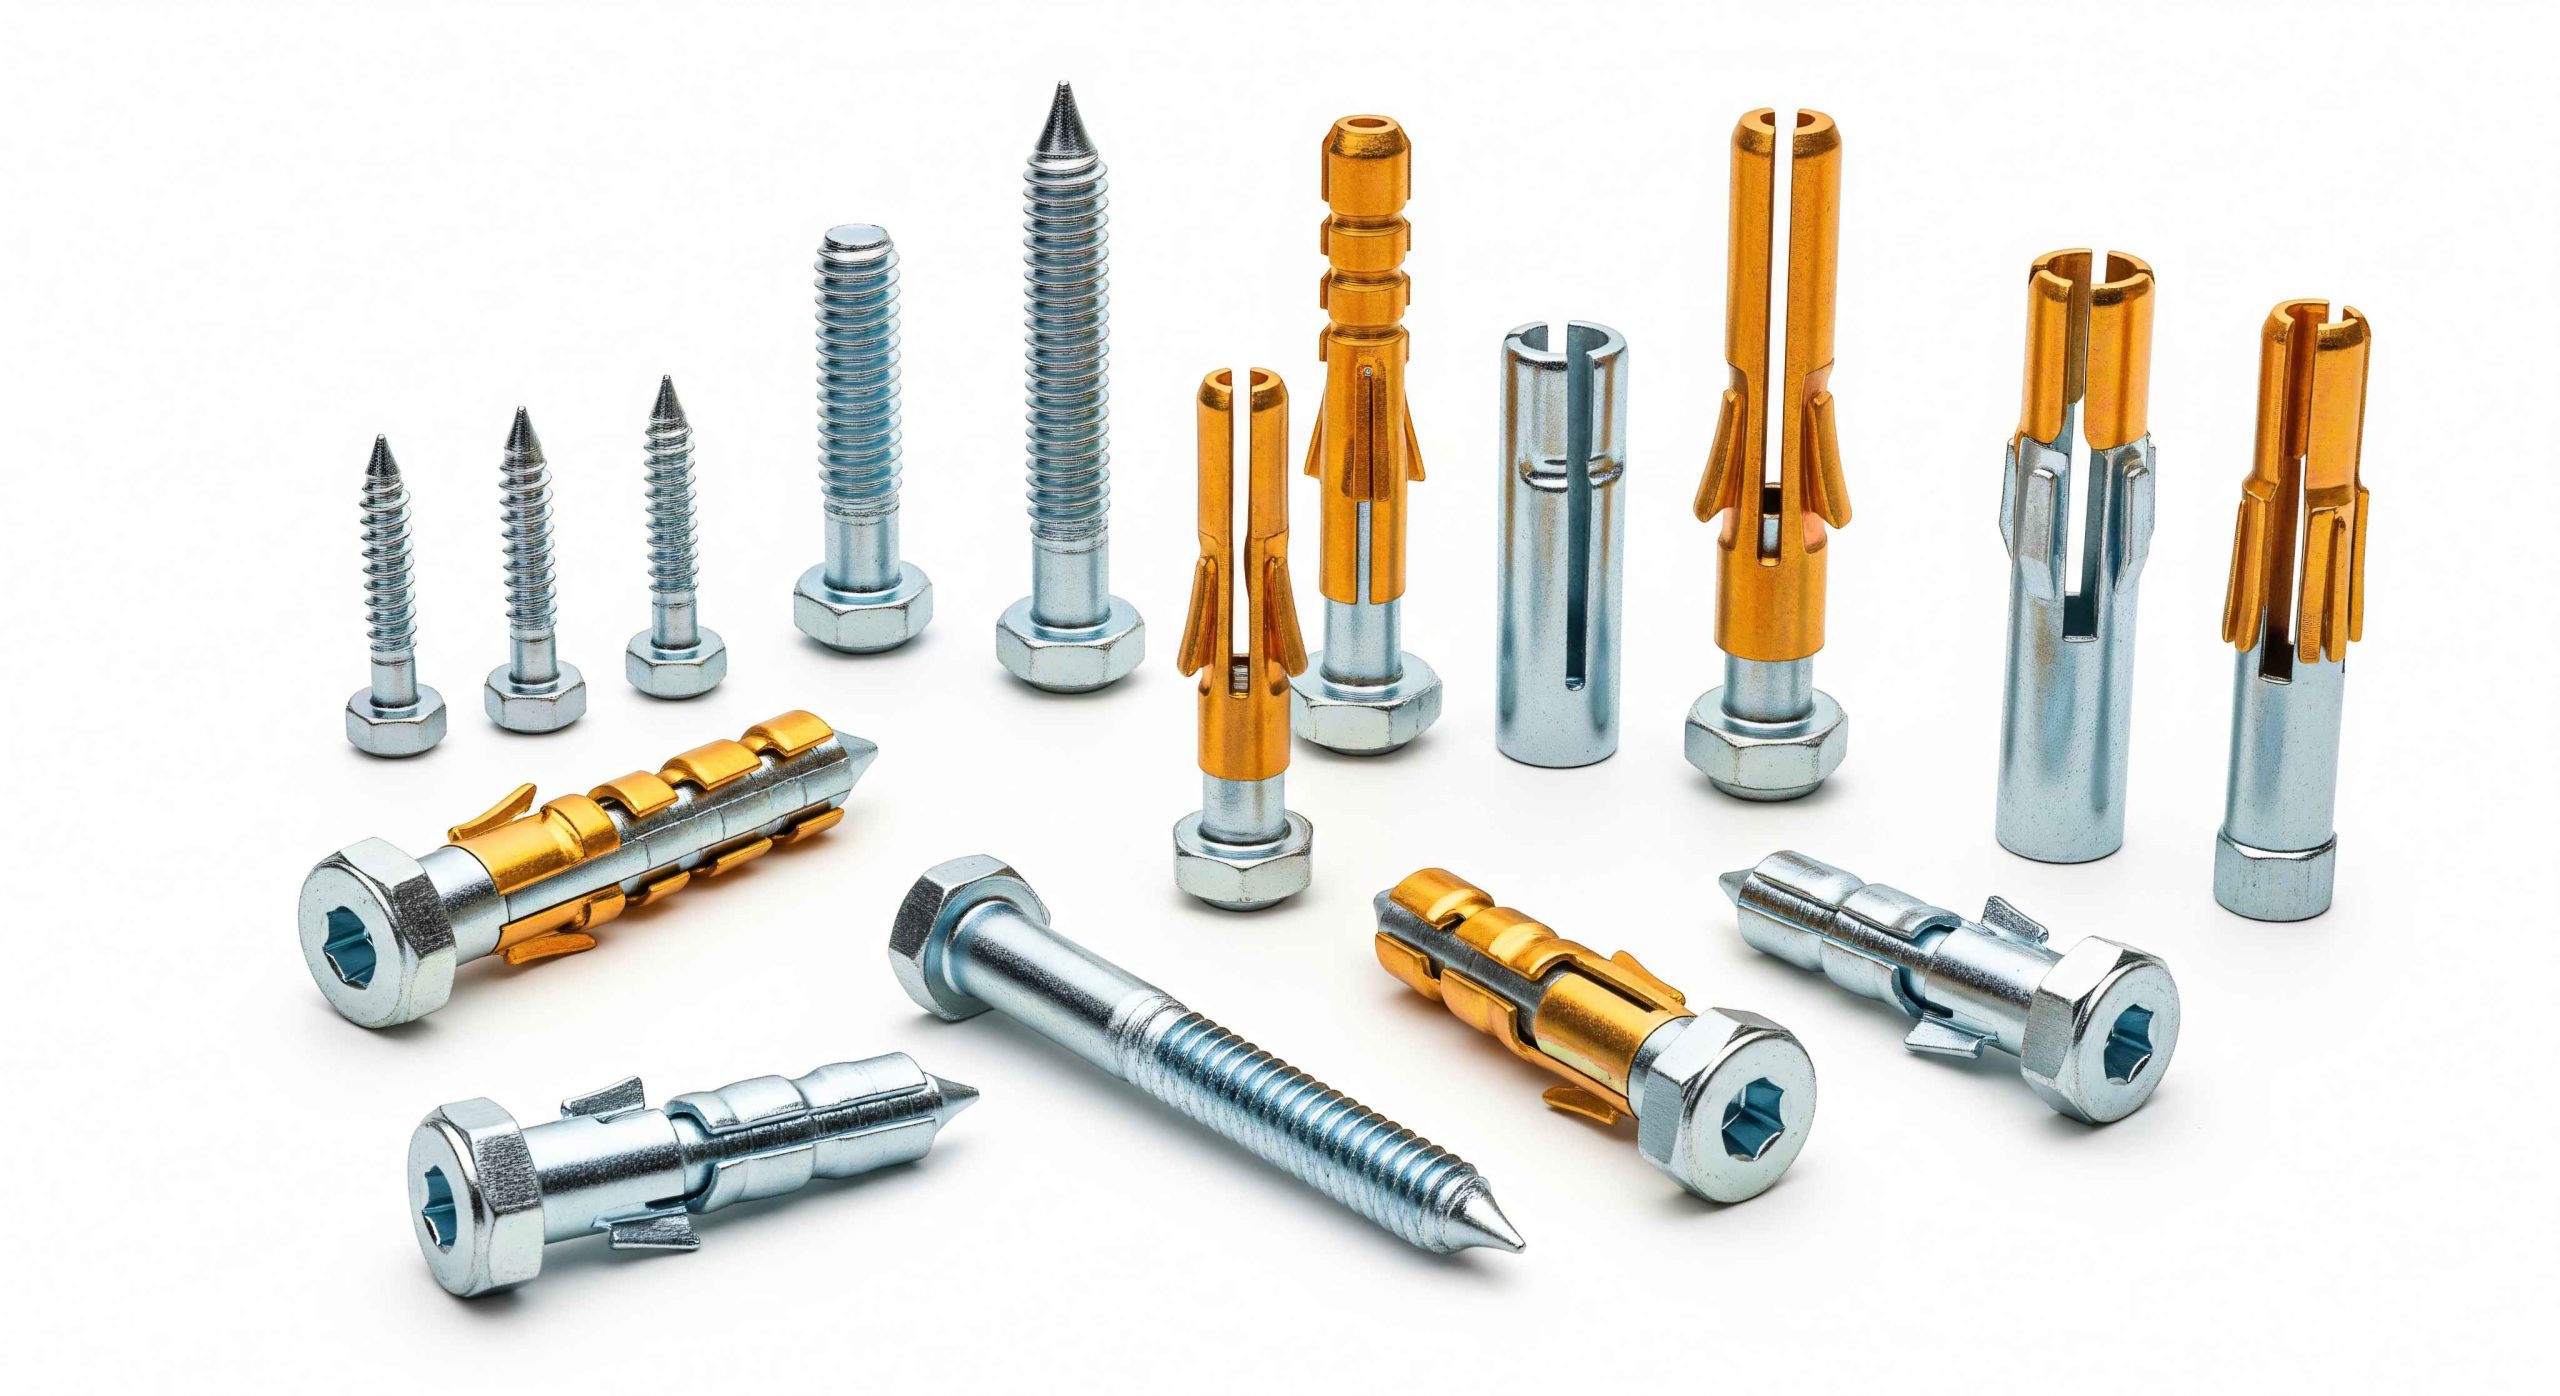
A toggle bolt, or a butterfly anchor, is a type of fastener that secures items to hollow walls such as drywall or plasterboard, where normal screws or nails won’t work. What makes the toggle bolt better than regular screws or nails is its spring-loaded wings or “toggle” at the end. These wings are what expand behind the wall to give the bolt better holding power. The purpose of the wings is to spread the weight of the load over a bigger area.
The typical toggle bolt is made up of two main parts: a threaded bolt or machine screw and a spring-loaded wing mechanism that folds against the bolt during insertion and opens back up once inside the hollow space. This design lets the toggle bolt create a strong anchor point by squeezing the wall material between the expanded wings and the fixture being mounted.
How Do Toggle Bolts Work?
Toggle bolts work on a simple yet effective mechanical principle. When you insert them through a pre-drilled hole in the wall, their spring-loaded wings remain folded or compressed against the bolt shaft. This allows the wings and the bolt to easily slide through the hole. After the wings pass the inside wall, they spring open thanks to the built-in spring mechanism, giving the bolt a wider surface area inside the wall.
When you tighten the bolt, the expanded wings move closer to the the wall’s interior surface while the bolt head or the item being mounted presses against the exterior. This prevents the bolt from simply pulling back through the wall because the load is spread out over a larger area. Toggle bolts work really well on hollow walls because they don’t have any solid backing material to drive screws into.
This distributed pressure and the large surface area of the expanded wings, which can support substantially more weight than conventional wall anchors or screws alone in hollow walls, are what give a toggle bolt its strength.
How to Use Toggle Bolts
To correctly use toggle bolts you need to know when and how to use them. Toggle bolts are a great choice if you are mounting fixtures, shelving, cabinets, and other things to hollow walls where there isn’t a stud or solid backing. They’re also really useful in situations involving drywall, plaster walls, hollow concrete blocks, or thin plywood where regular fasteners would simply pull through the wall under the weight of the load.
When choosing toggle bolts for your next project here are some important things to keep in mind.
- Weight capacity: You want to choose toggle bolts that are rated for the weight of the item you’re mounting.
- Wall thickness: Look at the bolt length to make sure it is long enough to go through your wall.
- Hole size: Make sure the toggle bolt diameter will fit inside the pre-drilled hole.
- Material compatibility: Use stainless steel toggle bolts for wet areas or outdoors to prevent them from rusting.
How to Install Toggle Bolts
When you install toggle bolts the right way whatever you are mounting is guaranteed to stay in place for years to come. Follow these steps to make sure you are installing toggle bolts the right way.
- Figure out your mounting location and make sure there aren’t any studs, pipes, or wires in the area where you’ll be drilling.
- Choose the right size toggle bolt based on the item’s weight and the thickness of your wall.
- Drill a hole in the wall that is just big enough for the folded wings to pass through. Remember, this hole will be larger than the bolt diameter itself.
- Take the toggle bolt apart by unscrewing the bolt from the spring-loaded wings.
- Insert the bolt through the thing you plan on mounting.
- Put the spring-loaded wings back on the bolt. Be sure to double check that the wings are facing the right way. You want the wings to fold in the direction that will let them go through the hole.
- Fold the wings together and push the toggle bolt through the pre-drilled hole. Keep pushing until you feel the wings spring open inside the wall cavity.
- Slowly pull back on the bolt to set the wings against the inside wall surface.
- Tighten the bolt by turning it clockwise until the mounted item is secure against the wall. Be careful not to overtighten the bolt, this could damage the wall or strip the threads.
The installation process creates a secure anchor as the wings expand inside the hollow wall and distribute the load across a wider area than other fasteners.
How to Remove Toggle Bolts
Removing toggle bolts isn’t the easiest thing to do because the wings stay inside the wall. Unlike other fasteners that can be unscrewed and used again, toggle bolts cannot.
- Unscrew the bolt from the wings. As you are loosen the bolt, you want to keep some pressure on it to prevent the wings from spinning freely inside the wall.
- Continue unscrewing the bolt until it is separated from the wings.
- Remove the bolt from the item you had mounted..
- Be aware that the wings will remain inside the wall. Most of the time, the wings fall inside the wall and cannot be removed unless you decide to take the wall apart.
- To repair the hole you can use spackling compound, joint compound, or a drywall patch. Which one you choose will depend on the size of the hole.
If you need to mount something else in the same location, you have two choices. You can use a new toggle bolt or you can use a different fastener that works with the material used to repair the hole.
Some new toggle bolts are designed with legs that snap off flush with the wall after installation. While this new design makes installing toggle bolts easier, removing them is still just as hard.
Advanced Toggle Bolt Variations
Over the years, the basic toggle bolt design has changed to now include some specialized versions that are intended for some very specific purposes.
Heavy-duty stainless steel toggle bolts are stronger and more resistant to rusting than regular toggle bolts. These bolts are the best choice to use outside or in areas with high humidity.
Spring toggle-bolt anchors are for light to medium-duty use in hollow block, wallboard, plaster, and plywood.
Releasable pin-type toggle bolt fasteners are relatively new design that is proving to be quite popular. When positioned in a hole, the toggle action prevents the removal of the bolt while a locknut anchors it firmly in place, but makes it easier to remove the bolt later.
Conclusion
Toggle bolts are one of the best ways to attach things to hollow walls where regular fasteners won’t work. Their design distributes weight across a bigger area inside the wall, which gives them amazing holding strength even though there isn’t a solid backing material. If you know how toggle bolts work and install them correctly, you can safely mount a wide range of fixtures and accessories to hollow walls.
Whether you’re hanging shelves, mounting a television bracket, or installing cabinets on drywall, toggle bolts continue to be one of the most reliable ways to fasten things together. Their continued evolution with features like stainless steel construction and a new releasable design shows just how useful they are in modern building and home improvement projects.


